LP12MF: Installing the Linn Lingo 4
Note: Although this installation guide is still mostly accurate, all my thoughts and reflections on the Lingo 4 have been updated in these posts: “The Lingo Saga” and “LP12MF Review: Lingo 4.” Short version: my initial Lingo 4 had a manufacturing defect. It took me a year to sort it out, but when I did, I was very pleased with what I heard — though forever turned against Linn and their shady, dishonest, unhelpful customer service.
It’s been a pretty exciting few weeks over here, what with the arrival of the Audio Desk ultrasonic cleaner and all. I’m still slowly making my way through my pile of not-yet-ultrasonic vinyl — I’ve washed a little over a hundred records now — and continue to have some pretty startling Oh-THAT’S-how-this-record-is-supposed-to-sound moments.
But I missed the process of actually installing something with the Audio Desk, which arrived fully formed. No such issue with today’s project, the Linn Lingo 4 power supply. Plenty of parts to stick together.
Quick backstory
Ever since my original Valhalla board melted shortly after I bought my 1986 Linn LP12, I’ve used Edmund Chan’s Hercules II board in a Mose case. I have had no complaints at all. It’s been totally reliable, it plays 45rpm as well as 33.3, the box is small and out of the way, nothing ever melted, and it was cheap.
And yet for as long as I’ve been interested in LP12s, I’ve been reading about other power supplies and the immense sonic difference they can make. I’ve never really understood how this was supposed to work, though I do get that turning at exactly 33.3rpm must be better for pitch accuracy than spinning at 33.4 — and God knows I have no idea how the “speed adjustment screws” on my LP12 worked, nor how to calibrate them. And I absolutely have noticed during my second-to-second listening tests that digital and vinyl tracks have a tendency to start right together but then drift apart in time. So I was excited about the Lingo 4’s use of an optical sensor to actually track how fast the platter is moving and to make real-time adjustments.
I also understand how a noisy or poorly isolated motor could have detrimental effects on sound quality. And I see how AC vs. DC power could make a difference. I don’t get how a DC setup like the Linn Radikal could cost $5000 ($9000 with the fancy case), but that’s another story. The AC-motor Lingo’s list price of over $2000 strikes me as pretty ridiculous, too — though the sheer insanity of the Radikal price makes it more attractive than it would otherwise be (is that Linn’s strategy here?) It also helps that one of my audiophile internet-friends — someone who has tried everything — told me that when he listened to a Radikal and Lingo 4 back to back, he could hear no difference.
But let’s not get ahead of ourselves. In a few weeks, in my next Listening Test, I’ll decide whether or not an expensive power supply like the Lingo makes a difference to the sound. For now, let’s just get it installed.
Installation Process

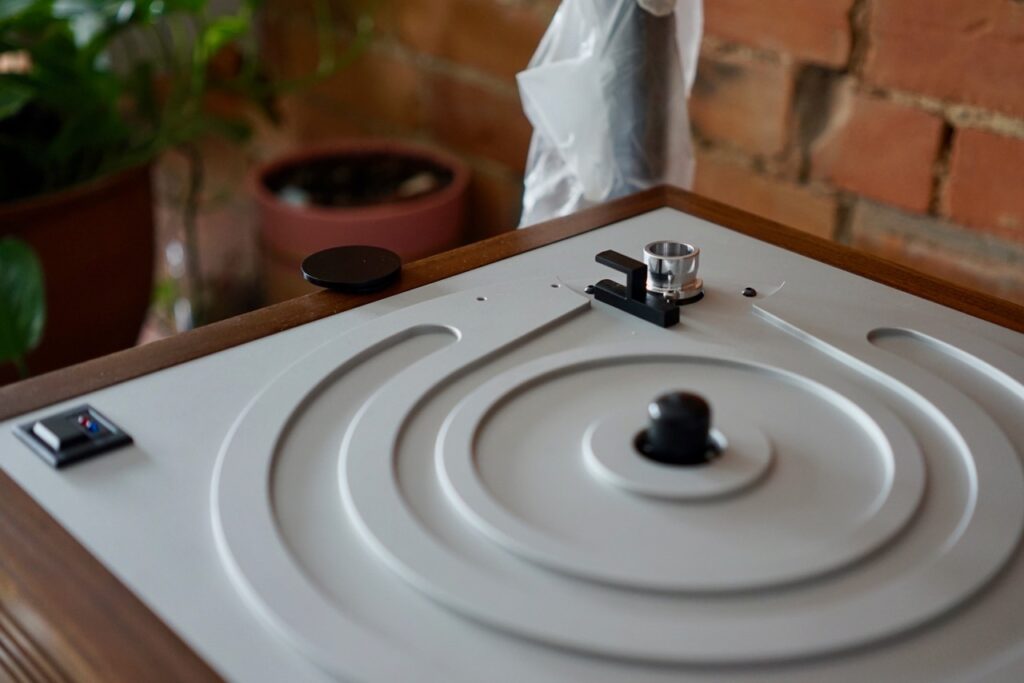
As I like to do, I did most of the boring setup work the night before. So the jig is level, the tonearm is off, the surgical gloves are ready, the clown is at attention, a cute little leaf is peeking into the frame — and we’re ready to roll. (One of the nice things about installing the power supply is that I didn’t need to remove the subchassis or re-set the suspension. Phew.)
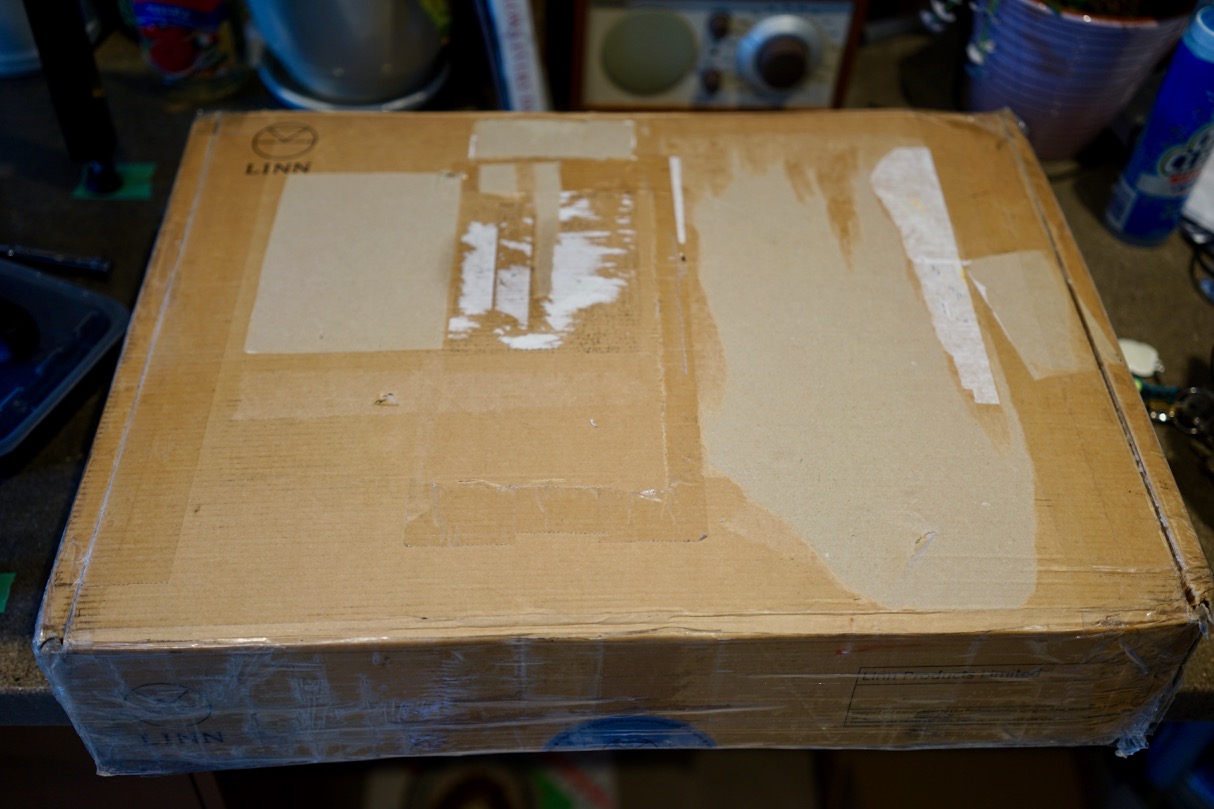
There’s the Lingo 4 box, which I obviously didn’t buy for its beauty. I got this from someone on Canuck Audio Mart. The box had been opened, but it had never been used or installed. I got it for significantly less than the new cost — but it still wasn’t cheap.
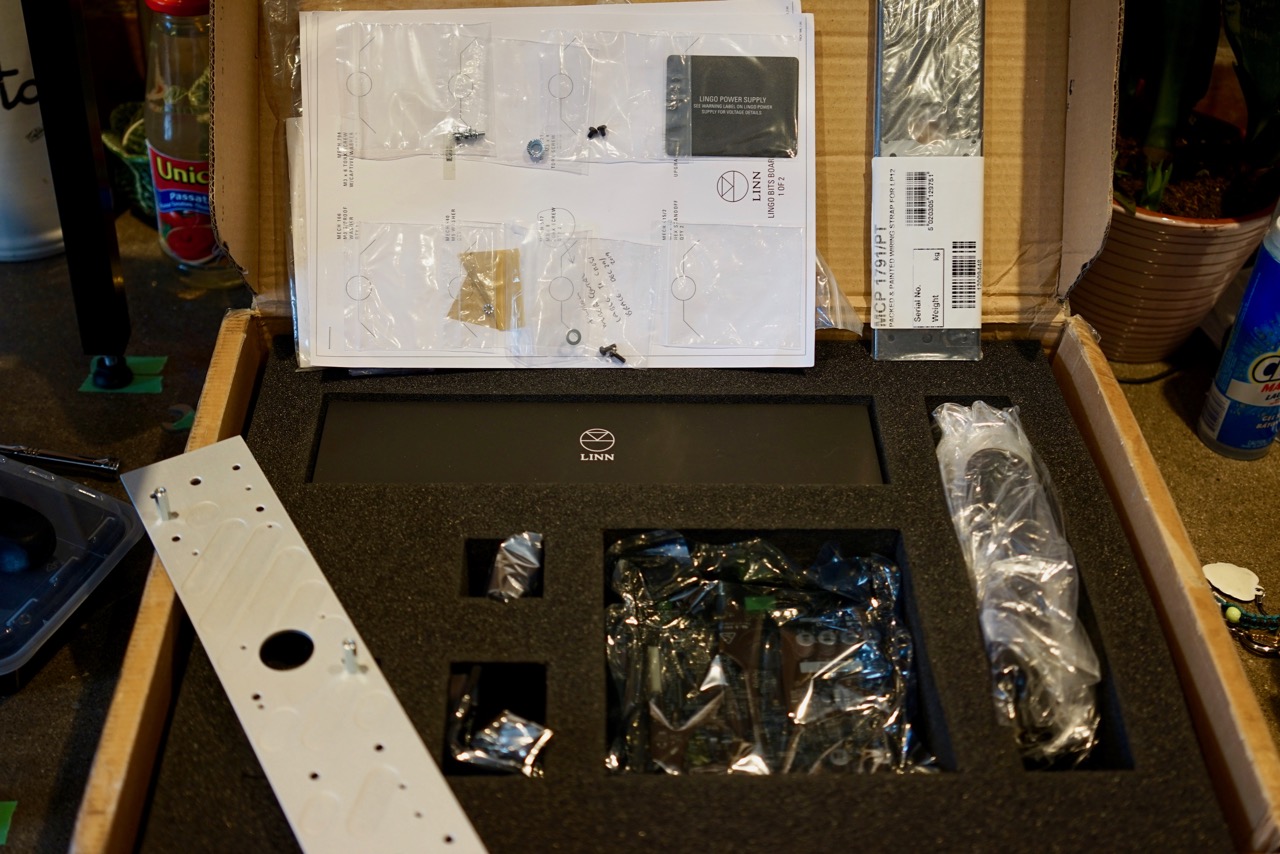
There are all the goodies. If you squint, you’ll be able to see the main control board, the power button, the speed sensor, and the various cables. There are also two stapled pieces of paper to which baggies containing meticulously-labeled screws and fasteners have been taped — take that, Ikea! The Lingo 4 comes with its own cross-brace, but when I bought my Tiger Paw Khan, I paid a little extra for the special Lingo-4 compatible one. That’s it on the left.
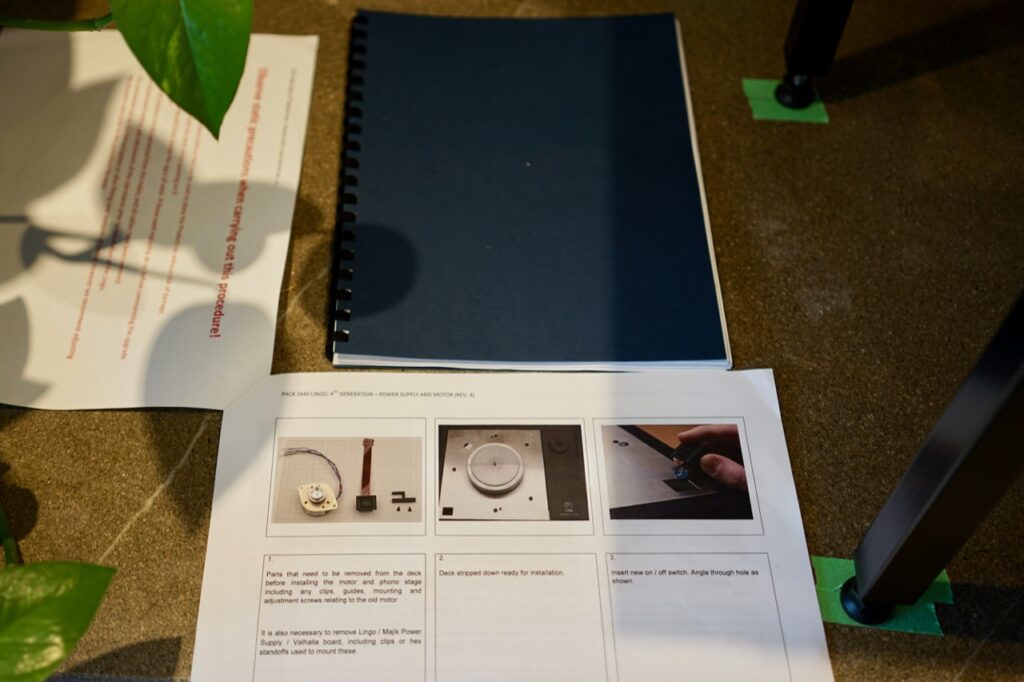
The Lingo 4 comes with a very detailed and helpful step-by-step installation manual. That’s good, because Peter Swain’s manual — spiral-bound above — doesn’t have any instructions for the Lingo 4.
Alright, fellas, time to go: motor, switch, and belt guide — all on their way out.
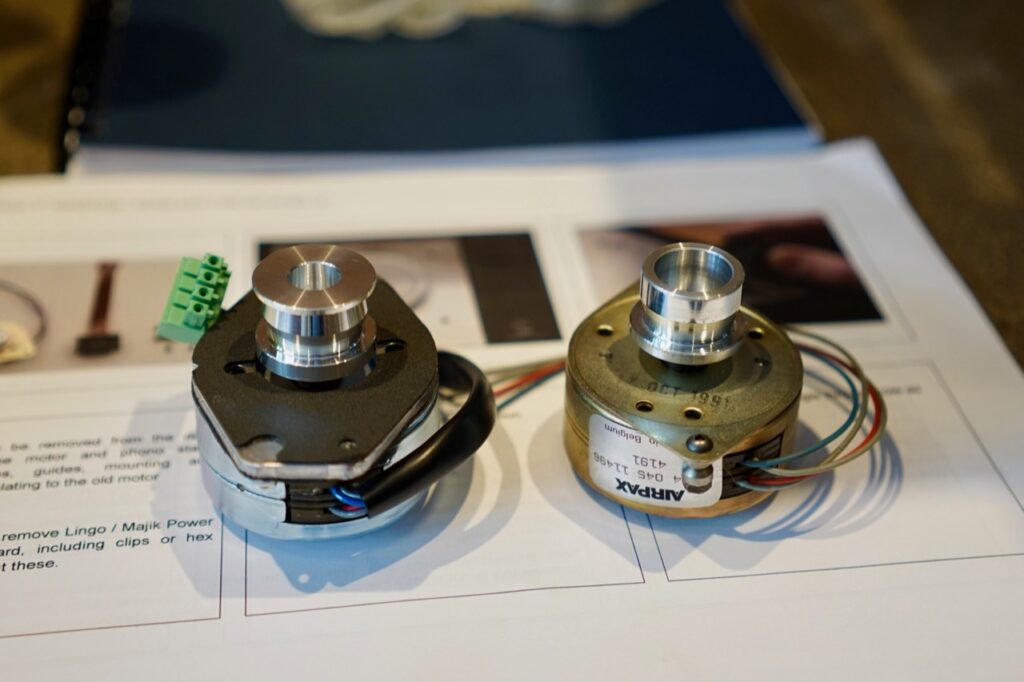
New motor on the left, old motor on the right. Interestingly, my motor is dated 1991 — five years after the deck itself was made. It must have been replaced by its original owner.
Right away, we’re into some trouble. I always wondered how the Lingo 4 speed sensor would sit on those cool elevated ridges on the Tiger Paw Khan top plate. Answer: it doesn’t. It’s still pretty secure and rattle-free held on by those two screws, but it’s at a weird angle and it sits too high. In use, as I’ve subsequently found out, it doesn’t rub against the platter in normal operation, and it still works as a sensor. But it does rub the platter sometimes when you put a record on and the platter bounces — and it definitely “fouls” on a bounce test. These sorts of things really bug me. At least I don’t need to look at it.
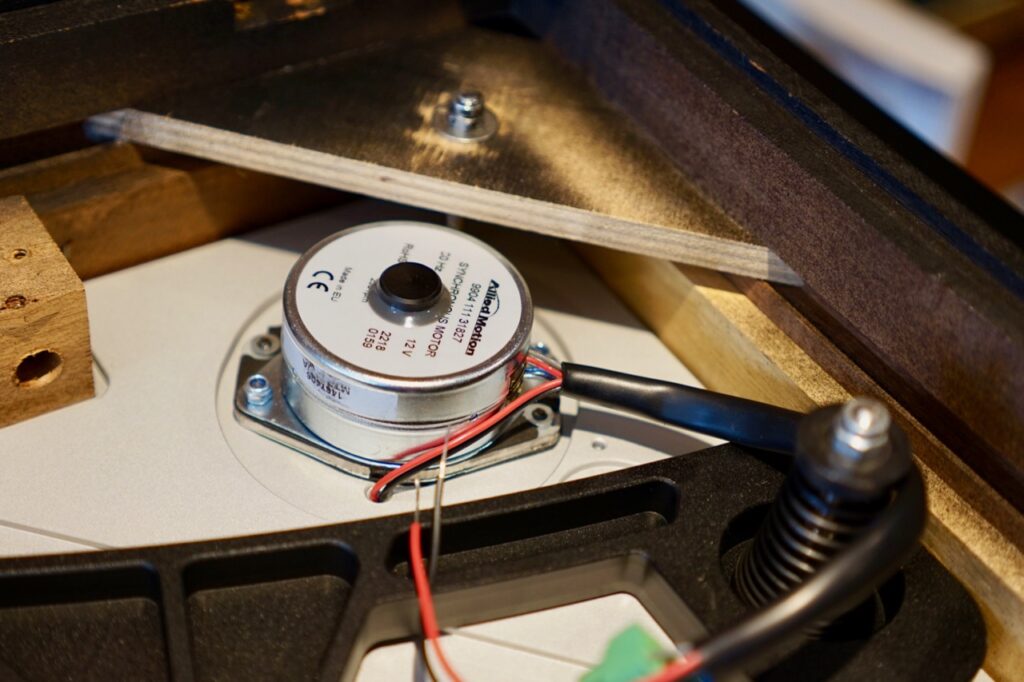
At least the new motor went on without issue. And it’s much easier to install than the old motor, since it sits directly against the top plate (no dome screws) and has no speed adjustment screws — all because the speed is self-regulating and no tilting is required.
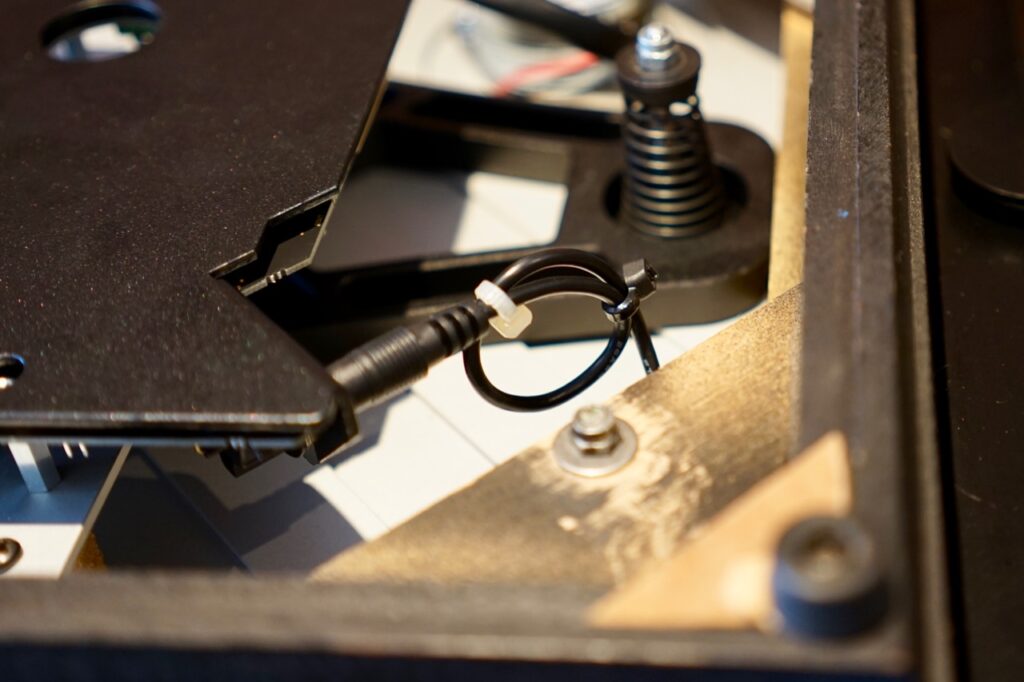
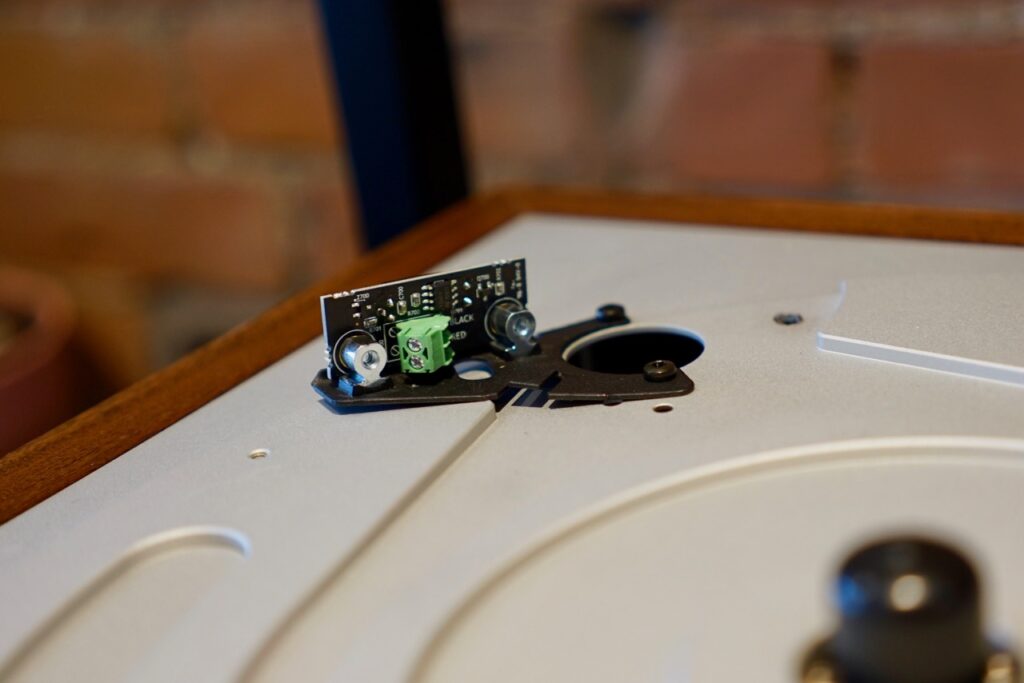
I neglected to take any photos of the bare cross-brace before the Lingo board was installed. But you can see it there on the bottom left. The Lingo board sits raised off on little metal “stand-offs.” That part of the installation is really easy. Somewhat trickier are all the little cables to route. There are separate wires to connect the speed sensor, the motor, the power switch, and the power supply. All of these need to be kept away from anything that moves. What you’re looking at up there is the cord that connects the board to the power switch. It’s a plain old audio cable with 3.5mm stereo miniplugs. I used some zip ties — not included in the supplied cornucopia of connectors — to keep the “cable dressing” (so much British vocabulary in hi-fi) nice and tidy.
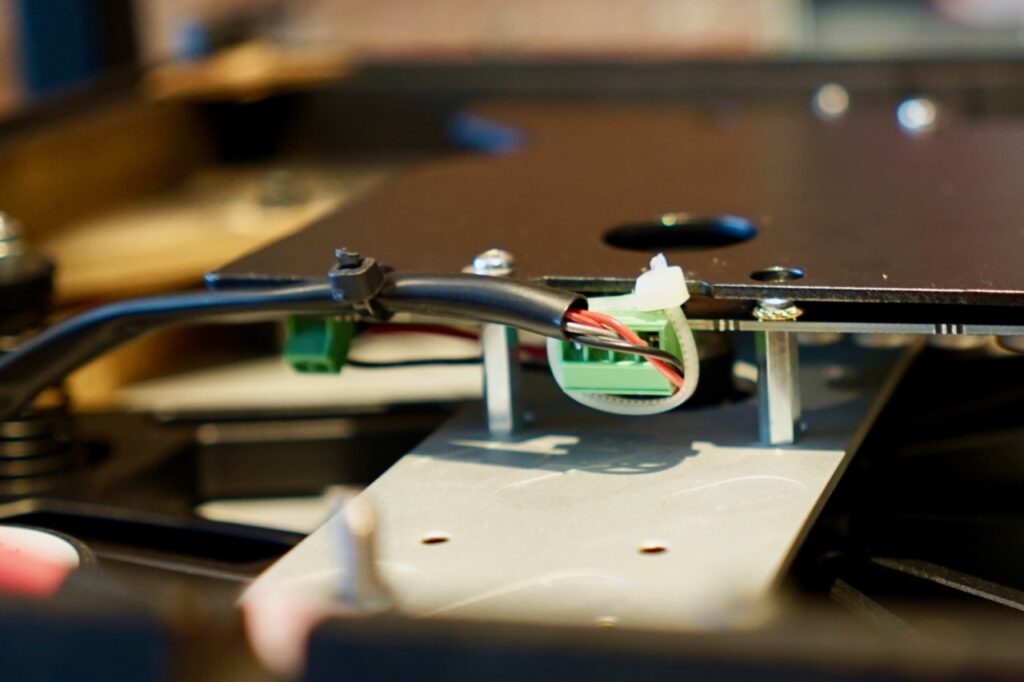
There you get a slightly clearer view of the Tiger Paw cross-brace and the metal stand-offs. And more cables and more zip-ties: the black one is one you’re supposed to use to secure the motor wires; the white one I added to keep the speed sensor wires in place.
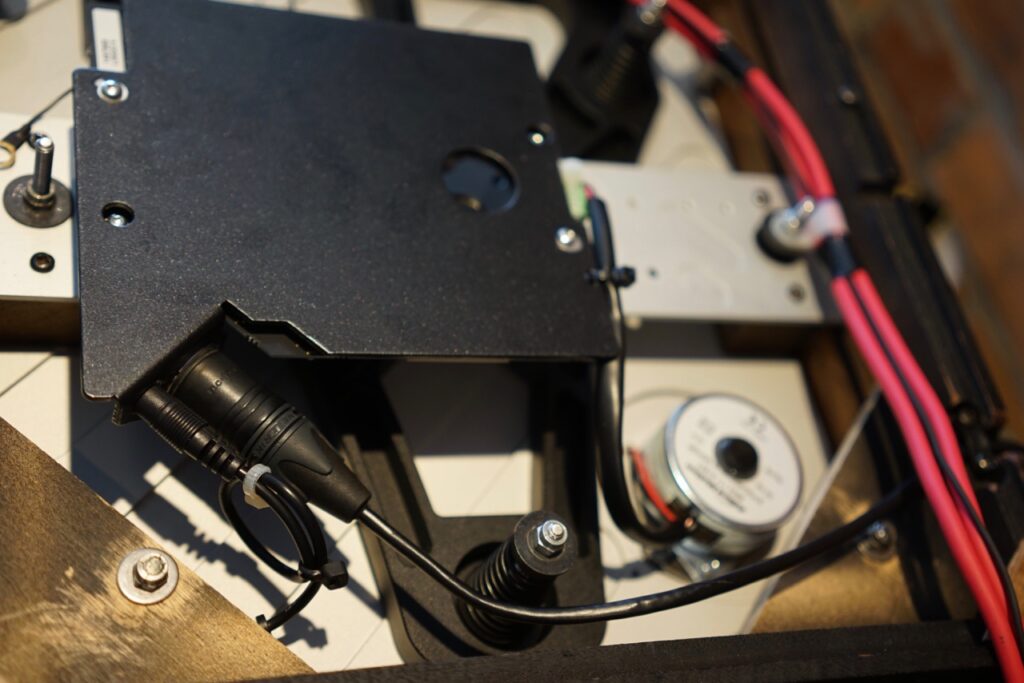
Not a bad overall look at the underside of an LP12 with a Lingo 4 installed. Note the XLR connector, which attaches the Lingo 4 board to the power supply. To me, there’s a kind of slightly improvised — or, to use a definitely non-British idiom, janky — quality to the Lingo 4, which extends to its use of audio connectors likes miniplugs and XLRs for non-audio purposes, and all those zip ties. But janky in a cute way, I guess? (It’d definitely be cuter if it wasn’t so expensive.)

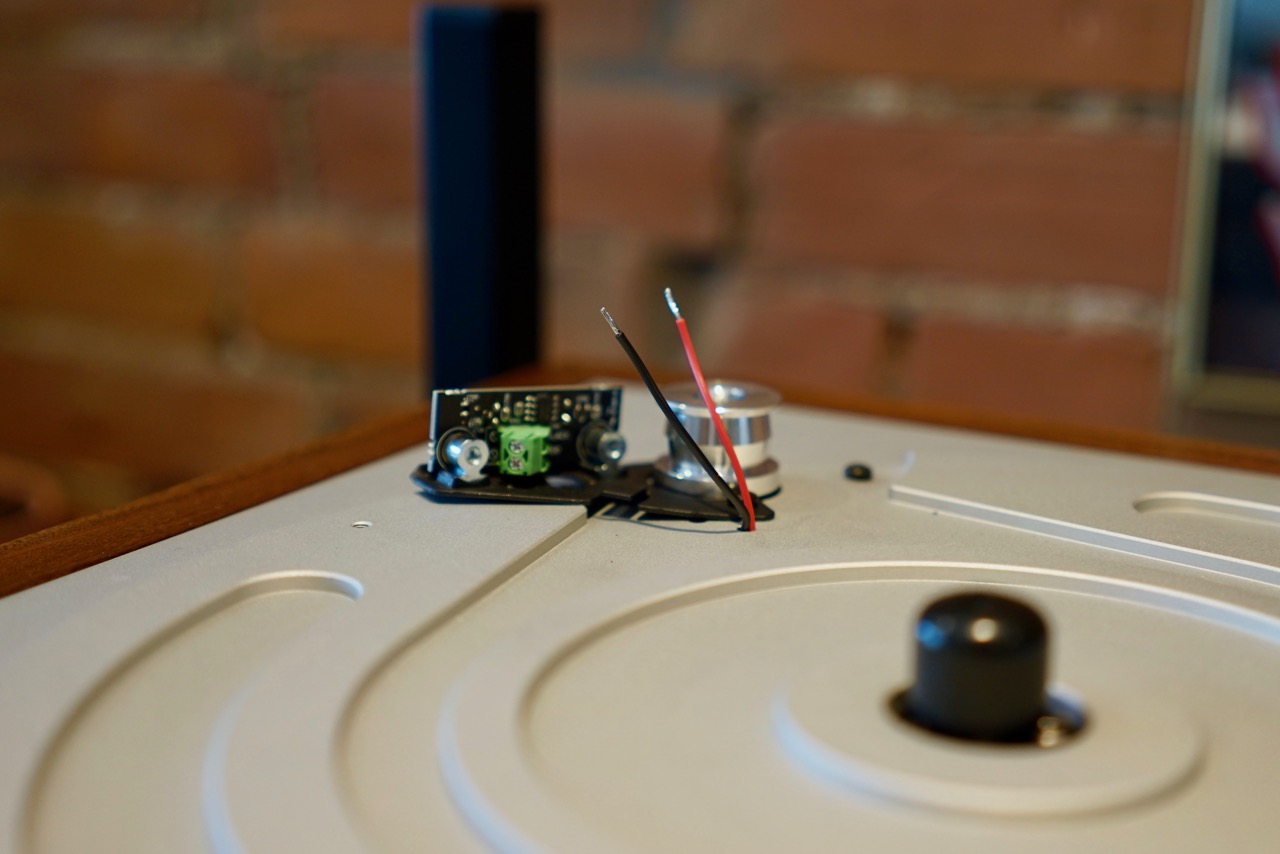
One of the last things to do is to connect the wires to the speed sensor. These route though a hole previously used for the belt guide. Don’t they look happy to be out in the open air?
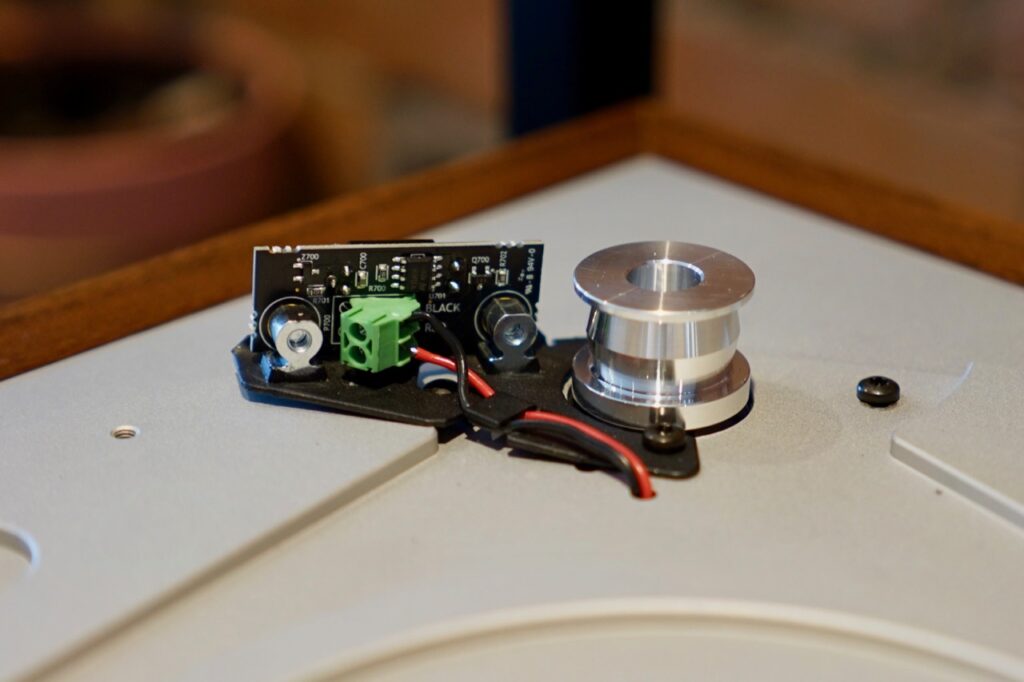
There they are all routed and screwed in place. My work was tidy — but, ugh, that off-kilter speed sensor… so janky.
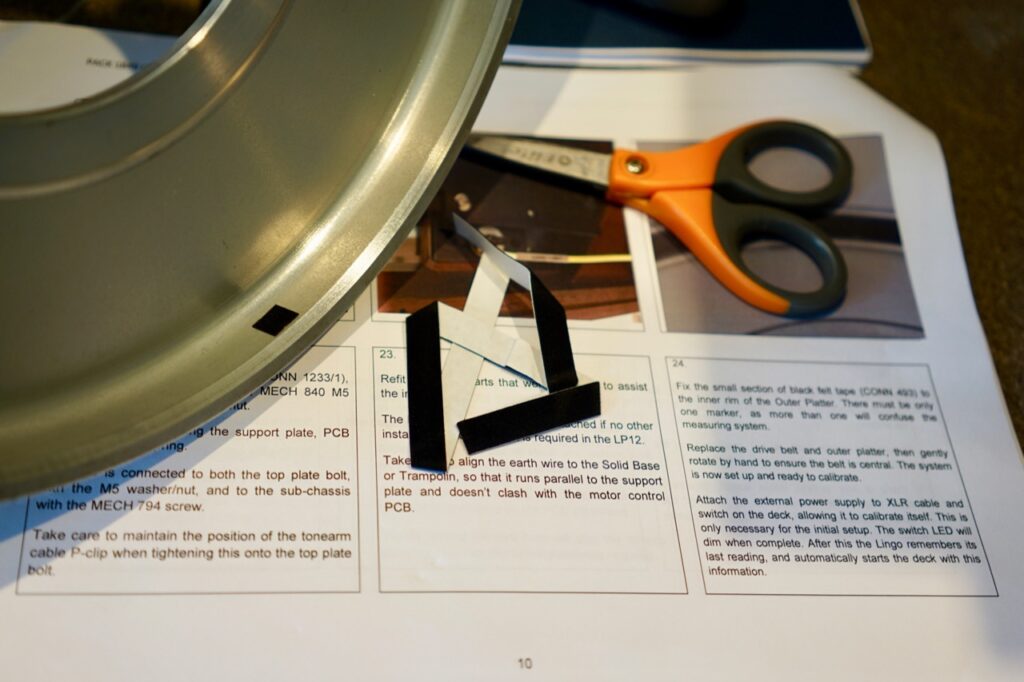
The jankiest part of all, for me, was the attachment of the felt marker to the underside of the platter. This is what the speed sensor uses to judge rotational accuracy — so it’s sort of important. But all you get in the box is a length of felt with a sticky backing, and no instructions on how big the marker should be. On my first shot, up there, I just tried to cut a square. But — most likely due to the janky crooked placement of the speed sensor — it didn’t work. So I cut a longer one that went all the way up to the point where the lip meets the top. That one worked.
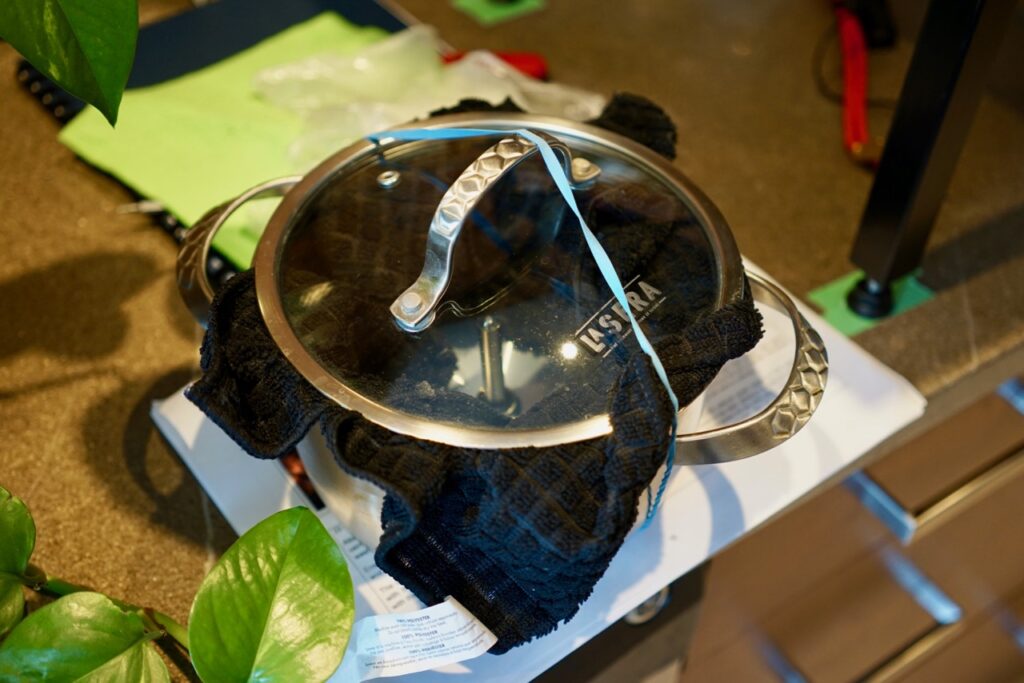
But I guess I should stop complaining about everyone else’s jankiness. This is how I stored my subplatter while I was working.
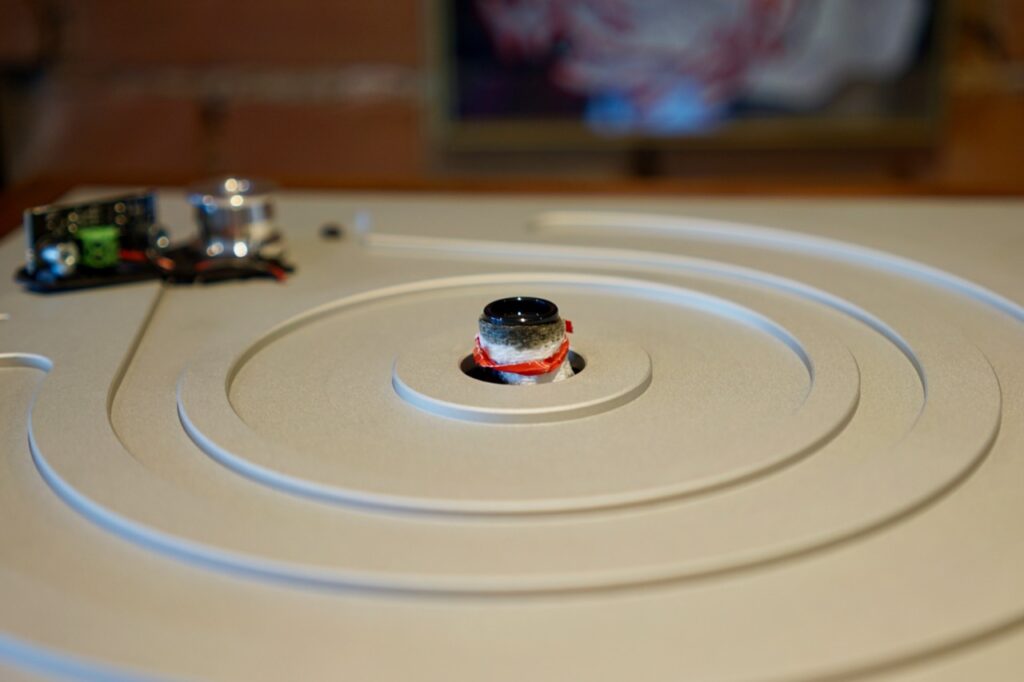
With the subplatter ready to install, it’s time to check the oil level. According to the spill test carried out with this adorable little twist-tie-scarved paper towel, we’re ready to rock.
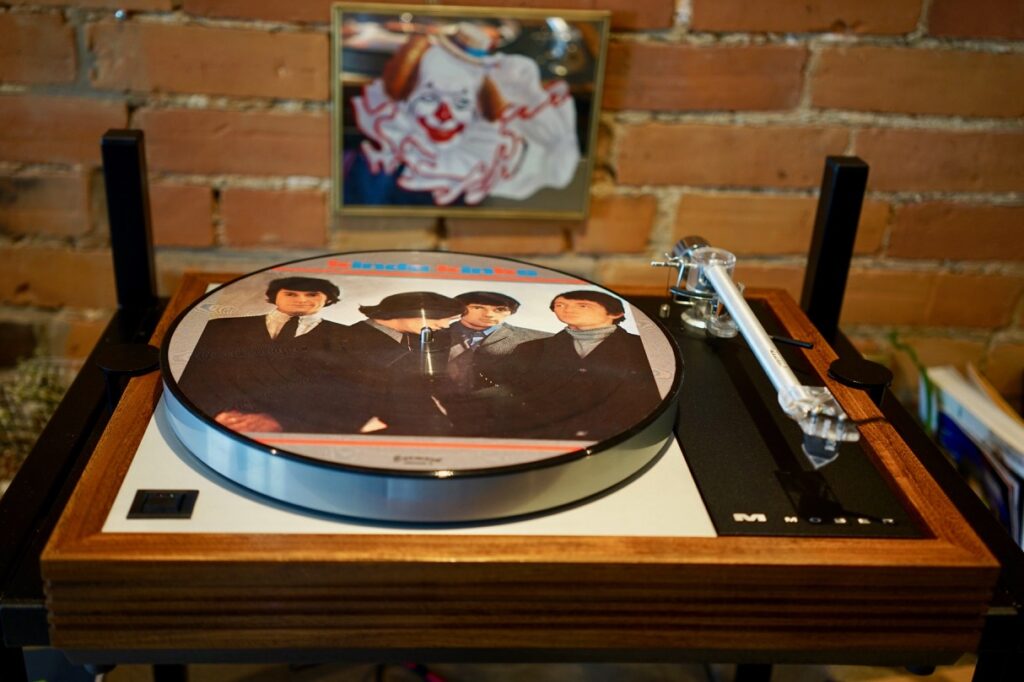
Here’s everything back together (boy was I happy that the platter didn’t rub against the janky speed sensor). Time to re-set the VTA, azimuth, and tracking weight. To add to the degree of difficulty, I used a silly Kinda Kinks picture disc. I could spare the extra time because this went so quickly — a little under two hours start to finish.
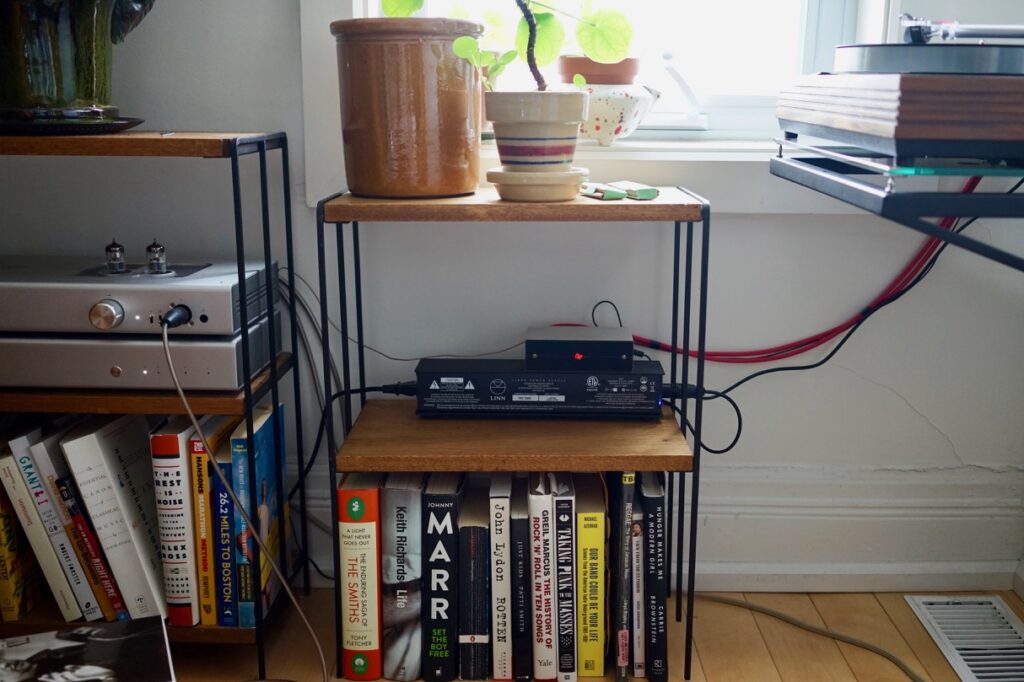
One thing I really like about the Lingo 4 is how small the outboard power supply is. I don’t know where I’d put a Radikal box, for example. I also prefer having the switch on the turntable, which isn’t the case with the Mober DC system or the Naim Armageddon. So the above setup works well for me.
Especially since I don’t need to look at it. (I need to do a slightly better job hiding the cable.)
The Lingo 4 in Use; or, Button Illogic
Once everything was set up, it was time to press the power button. But things didn’t behave at all as I expected. I could get it to start — but not to stop, and not to play at 45rpm. It took a visit to Linn Docs to sort it out. Here’s the deal.
One press turns it on at 33.3 (red LED). Another press gets it up to 45rpm (green LED). You have to hold it to get it to stop. And there are two brightness levels: bright red means the Lingo is reading the sensor, trying to get it to exactly 33.3rpm; dim red means you’re locked in. Same with green: bright and it’s still finding the right speed, dim and it’s locked. I show it all in the scintillating video above.
Until I figured all that out, I didn’t realize that my little felt pad was the wrong size. The LED just stayed bright red, never dimming, never locking on, never seeing the felt mark — and when I pressed it again, it would turn green but not speed up. I was immensely relieved when I put in the bigger piece of felt and the LED dimmed.
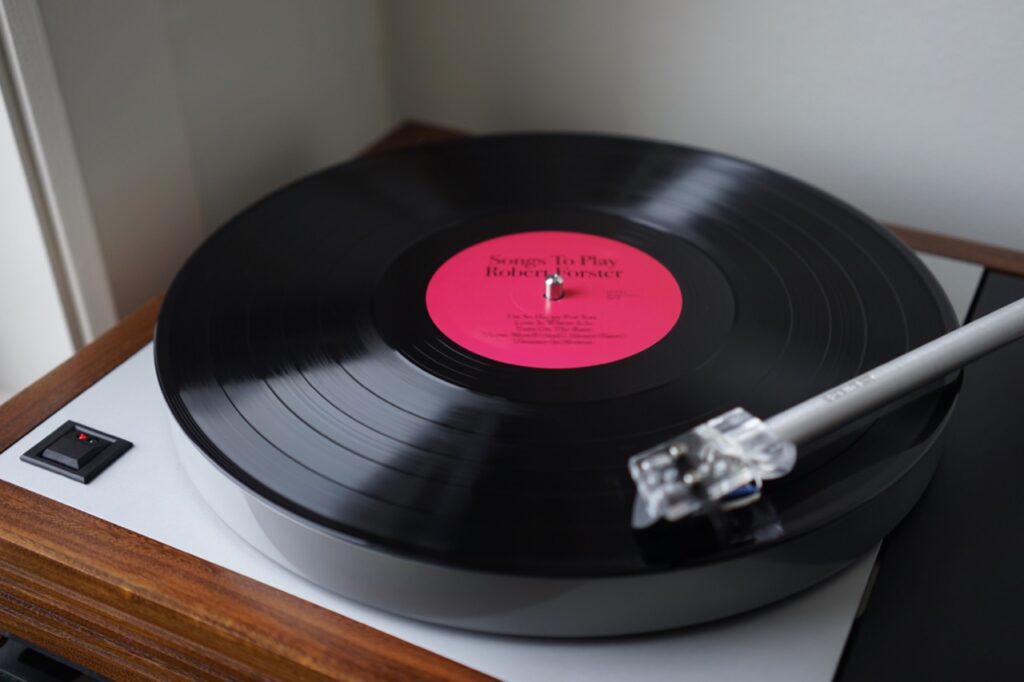
Aaanyway, the first disc I listened to was Robert Forster’s Songs to Play, a personal fave. First concerns: Is there any hum? Does music come out? All good. Second concern: How does the music sound? In this case, I have to say… it sounded unbelievable. I’d just washed this disc in the ultrasonic cleaner, and I hadn’t listened to it on the pre-Lingo table… but surely this disc couldn’t have sounded this good? Then I popped on Dungen’s Allas Sak and Low’s The Great Destroyer — and, good Lord, those sounded incredible too!
A very promising start — but before I get ahead of myself, maybe better to listen to some discs I’ve actually heard recently. Stay tuned for my Lingo 4 listening test in a couple of weeks.
Update: Noisy Motor
The day I installed the Lingo 4, there happened to be a crazy rainstorm in Toronto. My LP12 sits right next to a window against which raindrops were flinging themselves. So when I heard a sound like a faucet dripping really quickly near my turntable, I assumed it was the rain.
It wasn’t. The next day, rain-free, I went to play a 45rpm disc (Mariah, of course), and the quick-dripping-faucet sound got one third faster and quite a bit louder. It was definitely coming from the motor.
When I happened to leave the motor running with the lid close, the lid amplified the clicking by a factor of about three. I did not want that clicking in my turntable, echoing around in the plinth and being amplified by the lid!
At first I worried it was some kind of rubbing — the platter against the janky speed sensor, the motor against the housing — but that wasn’t it. I cleaned the belt and all surfaces it touched, then swapped in a brand new belt I happened to have lying around; no difference. I tried tightening the motor against the top plate and re-positioning it, to no avail.
Then I noticed that if I manually turned the subplatter with the belt installed, the motor emitted the clicking sound. So it was something mechanical with the motor. I did some Googling, and found that the likeliest thing was that the motor needed some oil, and just needed to be run in for a while. (Both strike me as odd in a super-expensive, brand new motor. But anyway.) I added a drop of 3-in-1 sewing machine oil, pouring it straight into the top of the motor — but checking in a few hours, and a few days, later, I saw it just pooled up in the motor and didn’t penetrate in.
After three days of running nonstop, the noise was significantly reduced. However, I do still hear it — especially when playing at 45rpm — and I’m pretty sure it’s louder than my old setup, where I never heard any such sound — though I admittedly didn’t spend as much time with my ear right next to the motor.
Further update: Replacement motor required, or more run-in time?
After doing a listening test on six of my twelve test tracks and finding no improvement with the Lingo 4 — and some degradation with 45rpm discs, on which the motor noise was most present — I decided to consult with the good people over at pinkfishmedia about the motor issue. They recommended I unscrew the motor, hold it in my hand connected only by the wires, touching nothing, and see if it made the noise. It did. I also made a video showing the noise produced with no belt installed.
The consensus was that there is something up with the motor and that I need to get a replacement from Linn. I’ve contacted them and we’ll see how this turns out.
I then wrote to Peter Swain of Cymbiosis, who is always incredibly generous with his time and wonderfully helpful. He said I might just need to let the motor run a little longer — which I’m hoping is the case. So on it ticks.
The people on pinkfishmedia also said I should level the speed sensor with spacers, which I should have thought of! The supplied screws were too short, but I found a couple of the right length. So at least that is settled! In the meantime, I’ve got the deck back in my office, and the music still sounds pretty great, despite the subtle ticking of the motor…
10 Comments
Join the discussion and tell us your opinion.
Shit man!!! after reading this get your very expensive kit fitted by a professional. That’s the moral of the story.
I respectfully disagree 🙂 I know what I’m doing and installed it exactly according to factory specs. (Also, it’s not at all complicated to do. If you want complicated, see my recent posts about building a phono stage.) The product had a manufacturing defect and Linn customer support was stubborn and useless.
Hey, Linn appears to let us believe this is neurosurgery. It is not, you follow instructions, don’t haste, you do it well – like you did mate – and then the ****’n motor is ticking. This is a 10p NoGo, and I promise I will follow this up carefully before entering any further plans for upgrading my No 1. Then guys… isn’t it great; a decade ago the Lingo 1 was …WONDER, and now it appears to be sth the cat dragged in. All in all I’m getting very reluctant to upgrade now.
Great site bookmarked it. No, it is not rocket science. I have two LP-12’s and seriously pondering a third one. I am a big fan of the Geddon PS as it can outlive me and it sounds great, in my opinion, preferable to the Lingo 1 which it replaced. I have other tables in some respects better than the LP-12 but a supply of parts and enough knowledge out there to sort out any issue and owning an LP-12 is a no brainer. Pondering the new bearing.
I’m getting more and more curious about the Geddon… as a Naim fanboy in general, I may just HAVE to try one.
I’ve got the Karousel and will be installing in the next few weeks. Stay tuned!
Hi tiger paw supplies a mounting kit for the speed sensor so you can install the speed sensor properly on a Kahn platter. It’s very simple, the holes are already drilled in the platter.
Kind regards, marcel
Hi Marcel,
Yes, I did eventually figure that out! I’ll write more about it soon here, but in the meantime here is a forum post where I described and photographed it. http://www.audioflat.co.uk/viewtopic.php?p=41748#p41748
interesting installation story!.
i am contemplating upgrading my Lingo 1/Cirkus bearing to the newer kit…doing both at once seems to be more logical as two trips into Loud n Clear Glasgow is a bit much!.Their resident “expert” in all things Sondek is Johnny of Audio Origami.
he’s previously serviced my late 80’s LP12 and installed a Dyn XX2MK2 cart on my Ekos 2, so he’s highly recommended.
With the more relaxed situation due to Covid these days it’s a wee bit easier visiting the shops ;)…Cheers.
Hi Dennis! You’re lucky to have Johnny (j7) nearby — truly an expert! He’s given me lots of help over the years from across the Atlantic, including some phone calls when I was at the end of my rope! Good luck, and I’m sure you’ll enjoy the Lingo 4 / Karousel — especially if you get a Lingo 4 under warranty in case you get a wonky motor!
I’ve got the Karousel/Kore combo. They demonstrated it at the local Stockholm Linn shop, and it sounded lovely. Arguably this since they played the ref combo FIRST and then Karousel/Kore. “Arguably” since some golden ears argue this is Psychology course Basic; No2 is always the better one. Anyway, I’m kind of tired of the Linn spectacle show, and I’ve said bye love to our Charlie there. Got water on my mill now with you relating the ticking-motor issue of L4 – cannot really believe it. A plain Al-cast Keel for some 5.000 quid anyone? Think not…