LP12MF: Installing the Linn Karousel Main Bearing
I’ve been highly skeptical of the Linn Karousel. As I discussed in my post on the Tiger Paw Tranquility magnetic bearing support, I just couldn’t make sense of what was supposed to be better or different about the Karousel, which made its high price of £750/$975USD hard to stomach.
But I’ve heard such good things about the Karousel, including from forum posters whose opinions I respect and who seemed as skeptical as I was, that I definitely became curious to try it for myself. When I was offered one for a significant discount (the result of dealer trying to make up for my Lingo 4 fiasco, on which, more soon), I decided to jump at the chance.
I’ve had it for a few months now, but have been busy fiddling with other aspects of my system — most notably, making external crossovers for my Yamaha NS-1000M speakers, which I’ll write about soon, too — so haven’t had a chance to try it. Honestly, it wasn’t at the top of my priority list, either, since I really couldn’t wrap my head around what advantages it was supposed to offer over the Cirkus bearing it replaced.
Anyway, this weekend things were finally sufficiently settled with my the rest of my system that I was ready to give the Karousel a shot. On Friday night, I listen to seven record sides and took detailed notes, then on Saturday morning I got everything installed and did some listening.
I’m going to keep my detailed listening feedback for another post. But I will offer a bit of a teaser/spoiler: in the brief period I’ve had the Karousel installed, I’ve been pretty stunned by the improvement it has made in my system. I was skeptical — indeed, given my affection for the Tranquility and my negative feelings about present-day Linn, I really wanted to hate the Karousel. But I don’t. If my impressions to this point hold, it’s one of the biggest single improvements I’ve made to my setup.
What’s In the Box
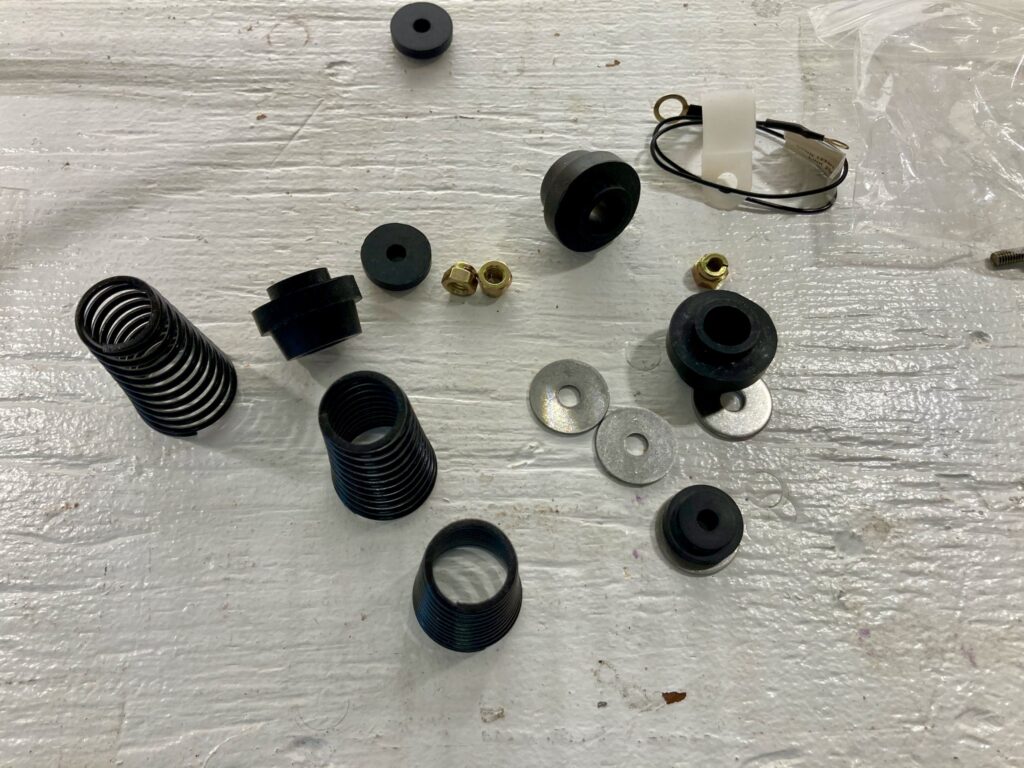
The cost of the Karousel is made perhaps somewhat more understandable by the fact that it includes a bit more than just the bearing. It comes with the following:

You get the bearing, a new subplatter (how it differs from the Cirkus subplatter I don’t know, so I’ll assume it’s the same), new springs and grommets, some oil, some screws (including some M5 bolts that don’t seem to serve any function, in stainless steel and plated steel), and some fittings like a P-clip and grounding wire. The only thing here that seems remotely worth mentioning are the brass locking nuts (“aerotight”) for the spring bolts, which are of a type I’ve never seen before from Linn (I’ve always seen steel nuts with a slightly different locking mechanism.
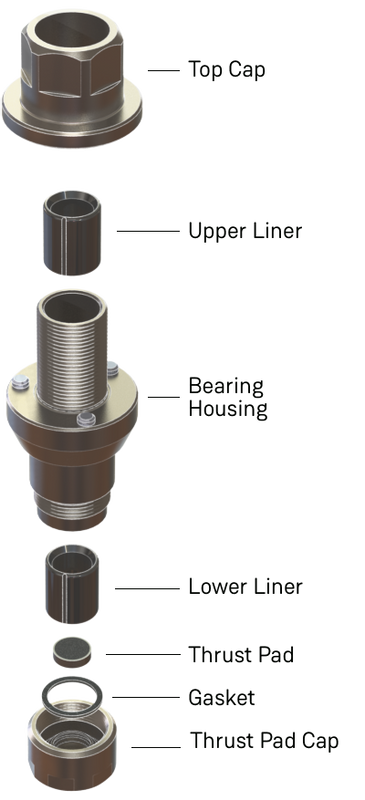
Dimensions and Diagrams
First, here’s a nice exploded diagram of the Karousel, courtesy of Linn:
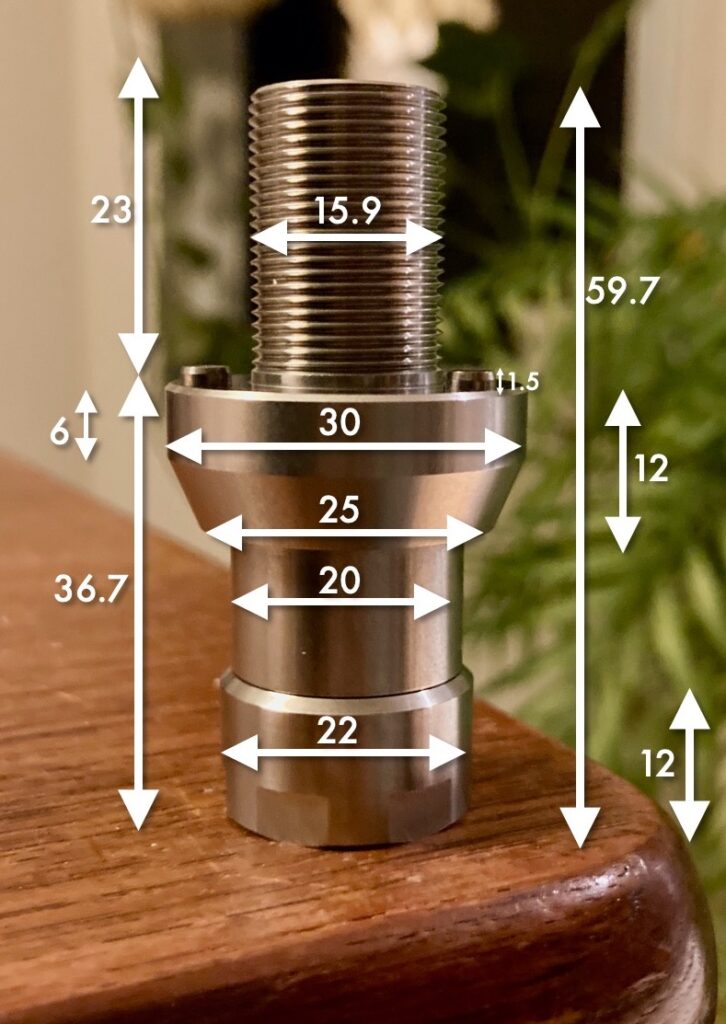
If you’re curious about the dimensions of the Karousel bearing, these images should give you everything you need. All taken by me with vernier calipers. All measurements in millimetres.

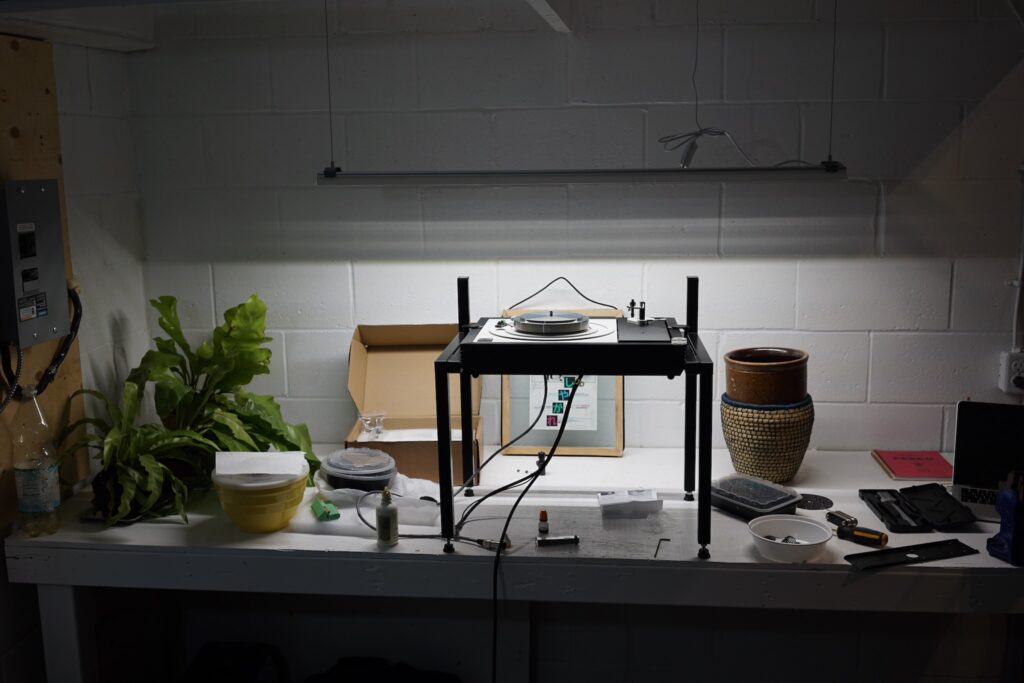
Getting it in
Time to gather the forces and install it.
Installing a bearing on an LP12 can be a bit of a pain, generally requiring you to remove your tonearm, and subchassis, resetting the suspension in the process. With the Cirkus bearing, which attaches with three bolts, you could remove it by sticking an Allen key through the aperture in the top plate and thus avoid all the above. But with the Karousel, which attaches with a massive nut, no such luck. (I mean, if Linn hadn’t decided to put a massive 30mm flange on the bottom of said nut, or if my Tiger Paw Khan top plate didn’t have a 27mm aperture, it would work. But, alas.)
One of things I was most curious about was whether the thrust pad cap section of the bearing would actually unscrew. If so, this would be a big win for the Karousel, as it would allow you to replace a worn thrust pad without having to replace your entire bearing. (If Linn would actually sell a replacement to its customers, that is — a big “if” with a company as baffling in its customer service as Linn!)
I got the bearing in the vise to find out…
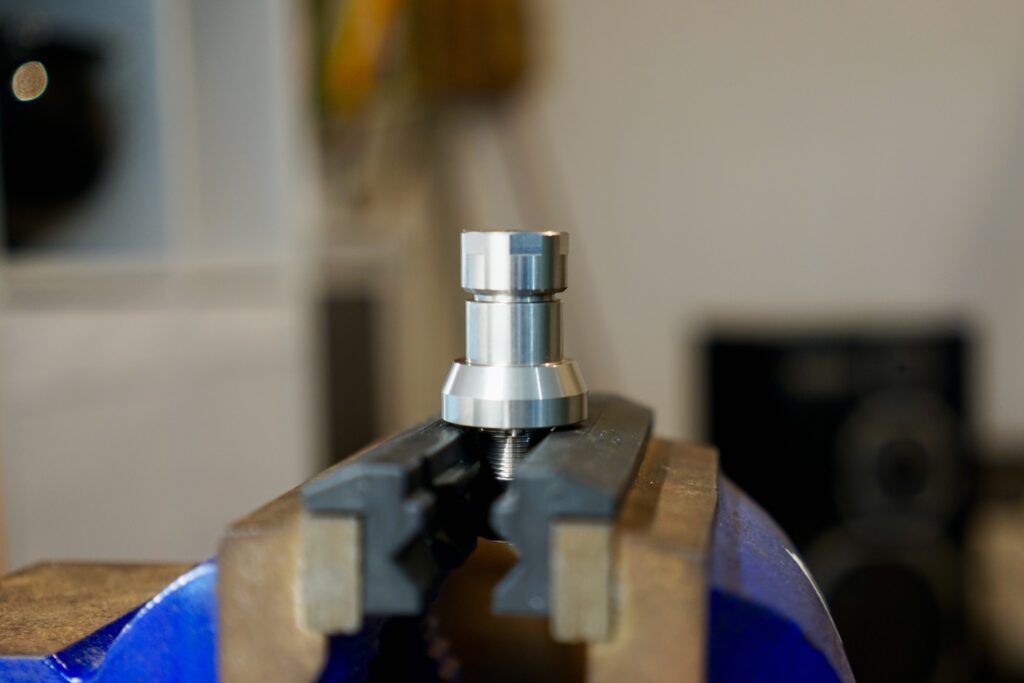
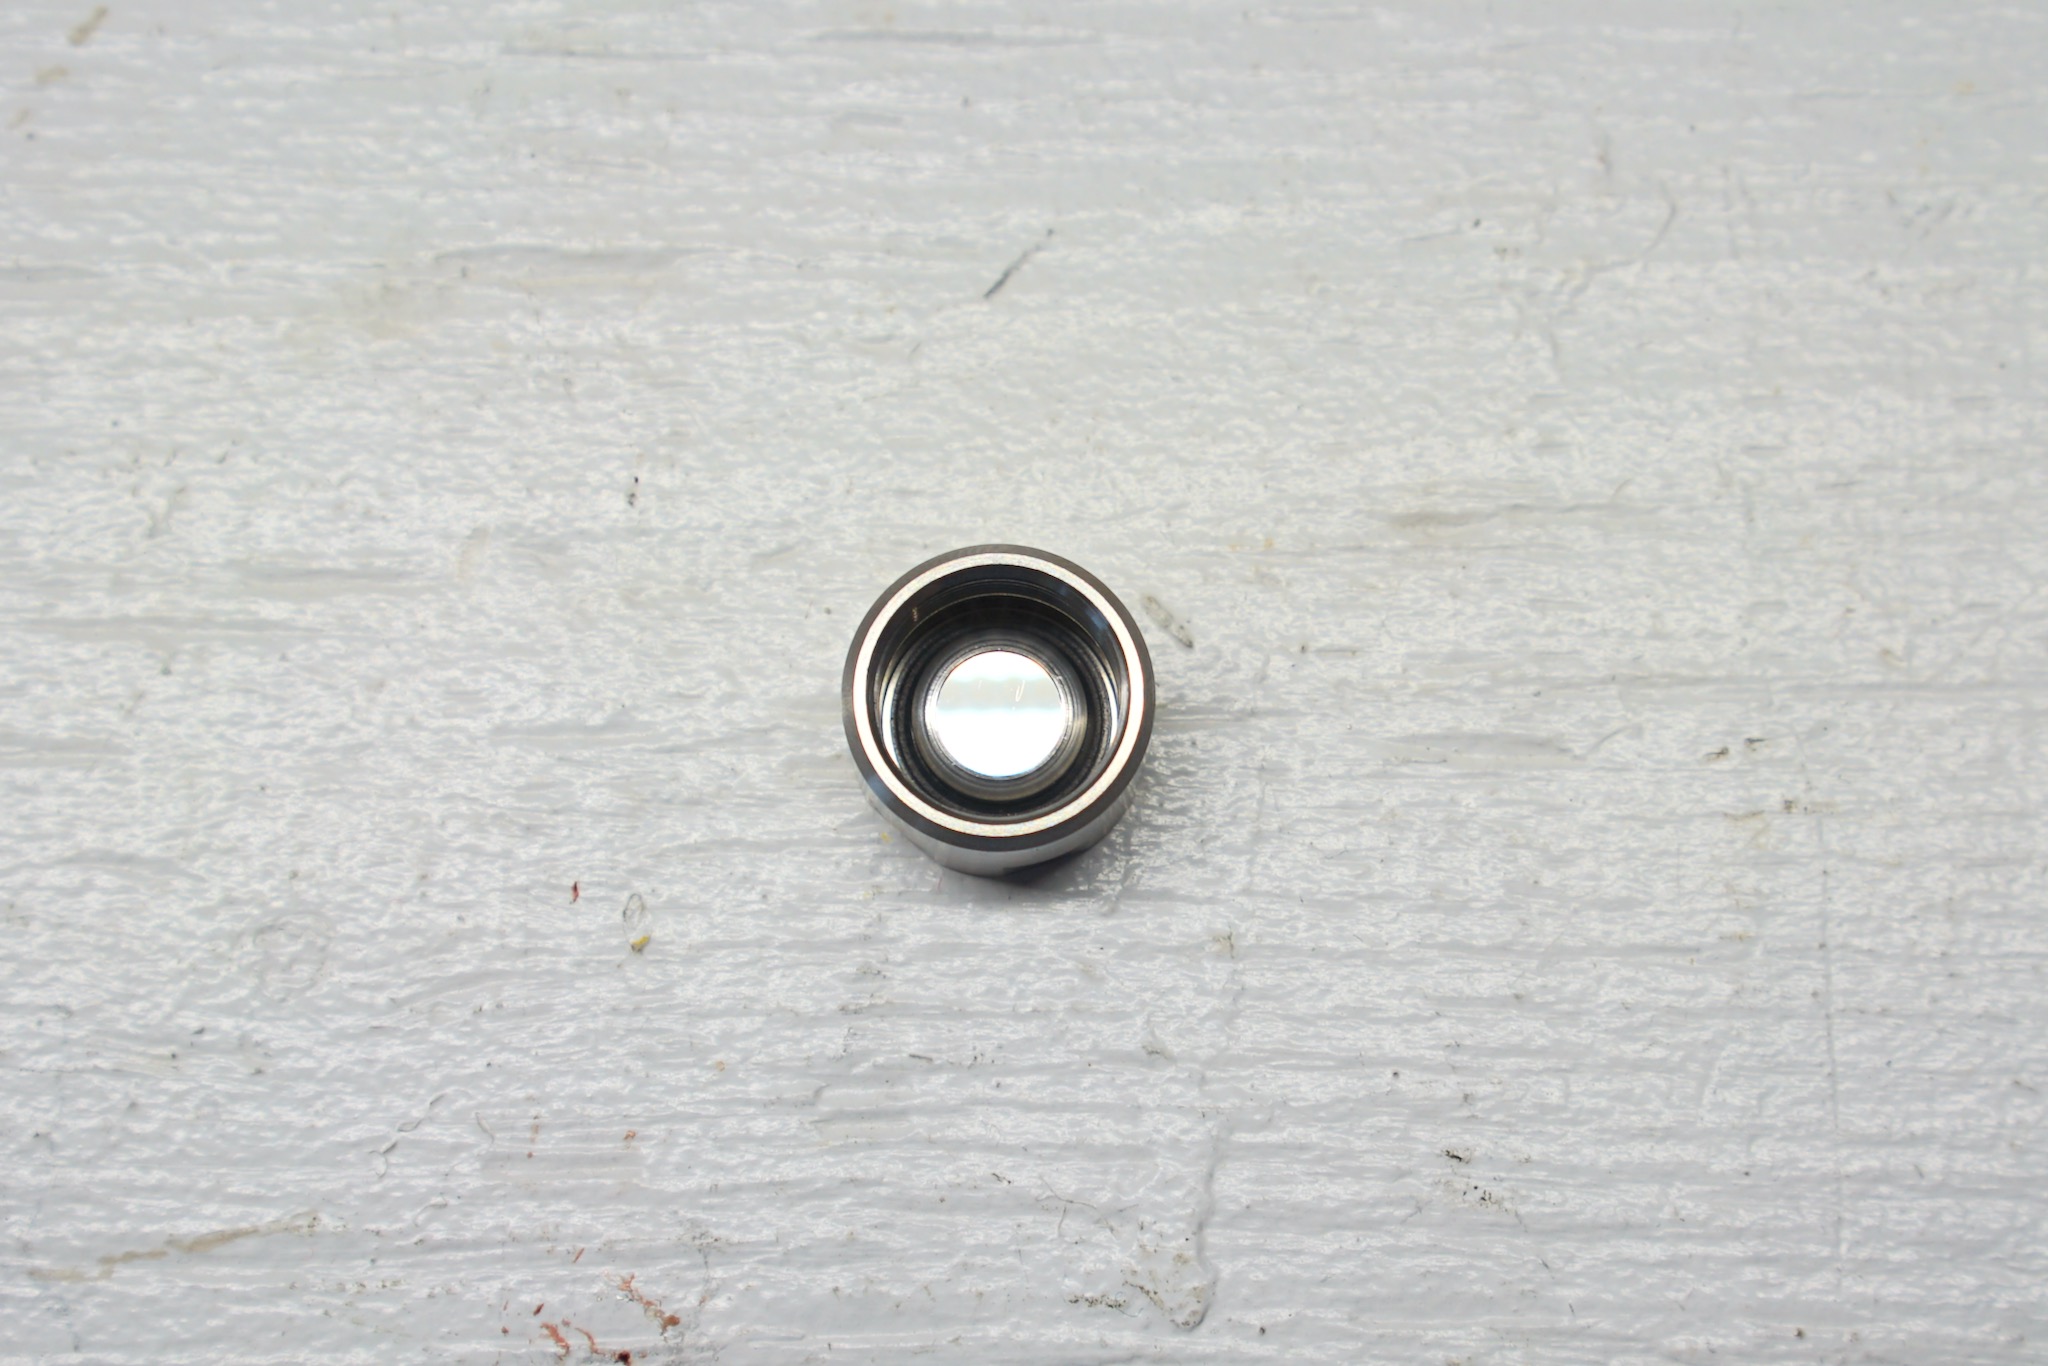
And the answer is: yes. It comes off easily. Here’s the bearing with the thrust pad cap removed:
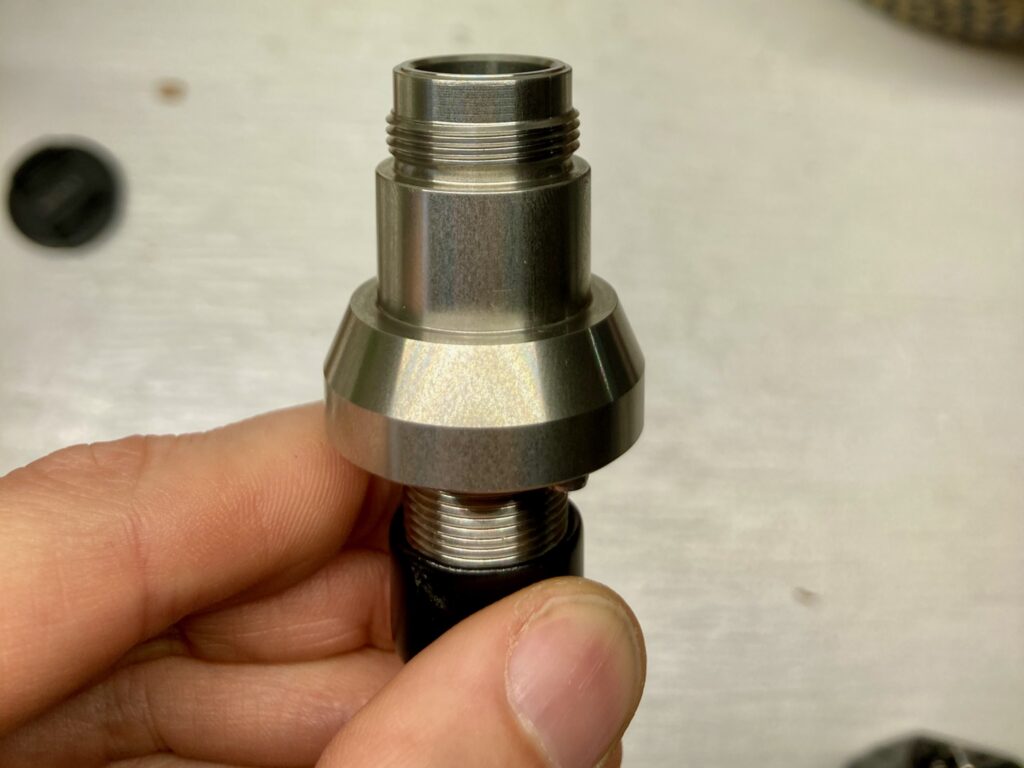
And here’s the thrust pad cap, showing the innards:
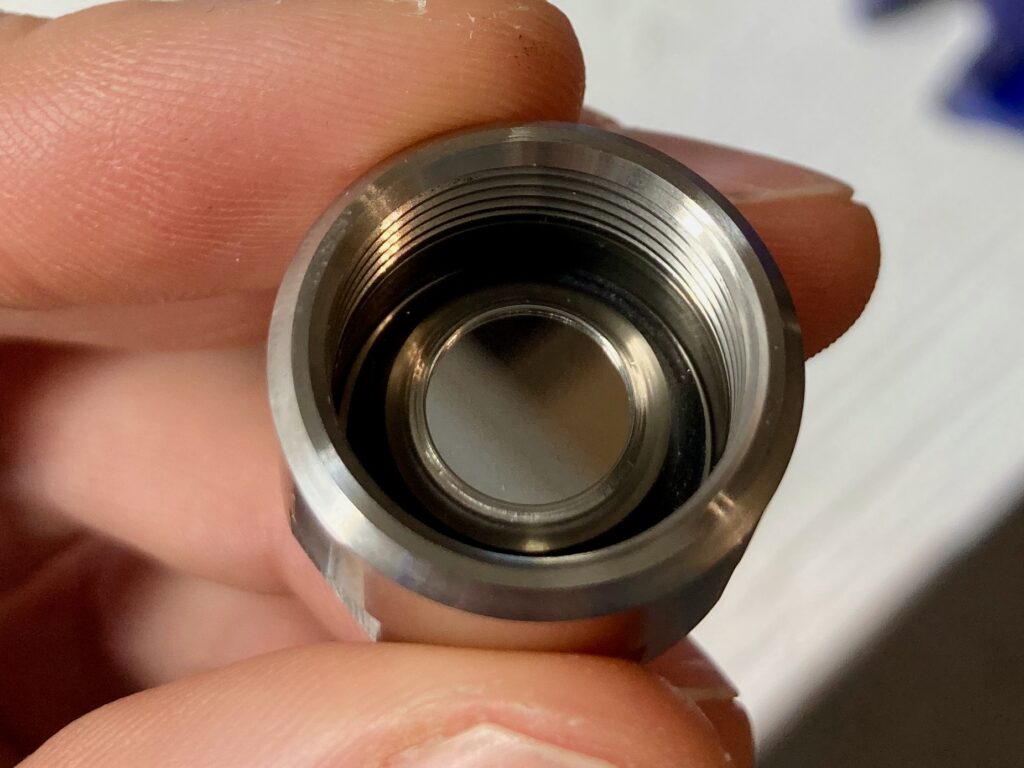
The thrust pad itself is highly mirror-finished. It’s fixed in place: I tried tapping it to see if it would come loose from the housing, but it didn’t. There’s a rubber gasket that seals the bottom of the bearing and keeps oil from escaping.
My curiosity satisfied, I proceeded to actually installing the bearing. Out came the Mober subchassis — which seem positively shocked at my plan to install a new bearing 😲.
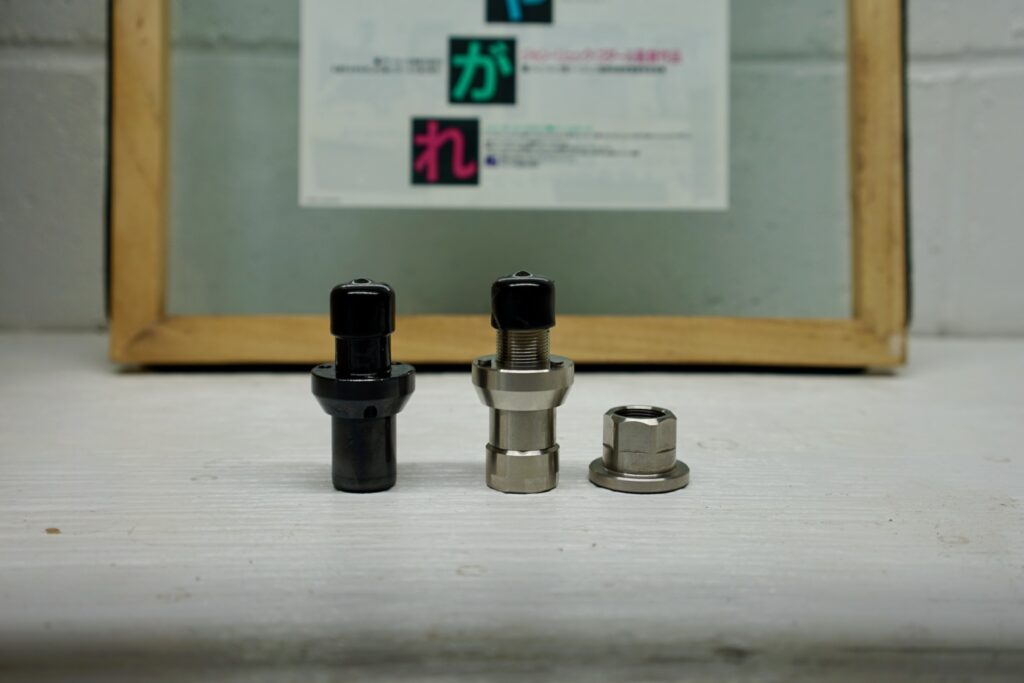
Here are the Cirkus and Karousel next to one another:
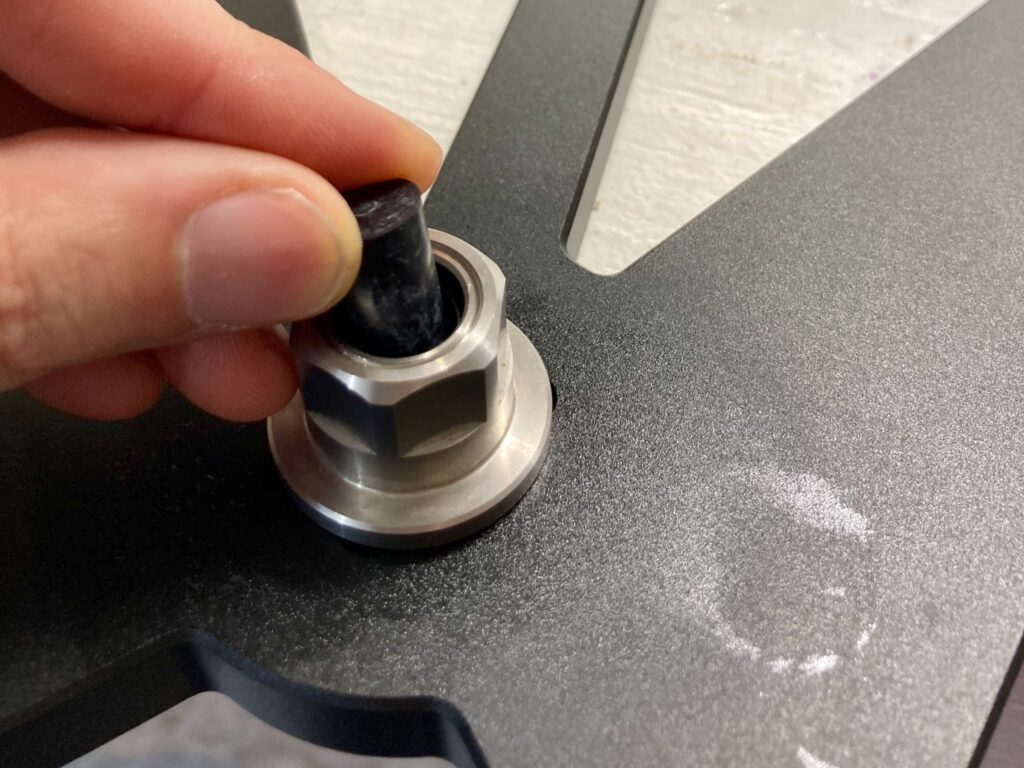
The Karousel anchors into the three Cirkus bolt holes. Then you get the top cap on and tighten away. I didn’t think there was much risk of over-tightening with those big stainless steel threads. So I got it as tight as I could.
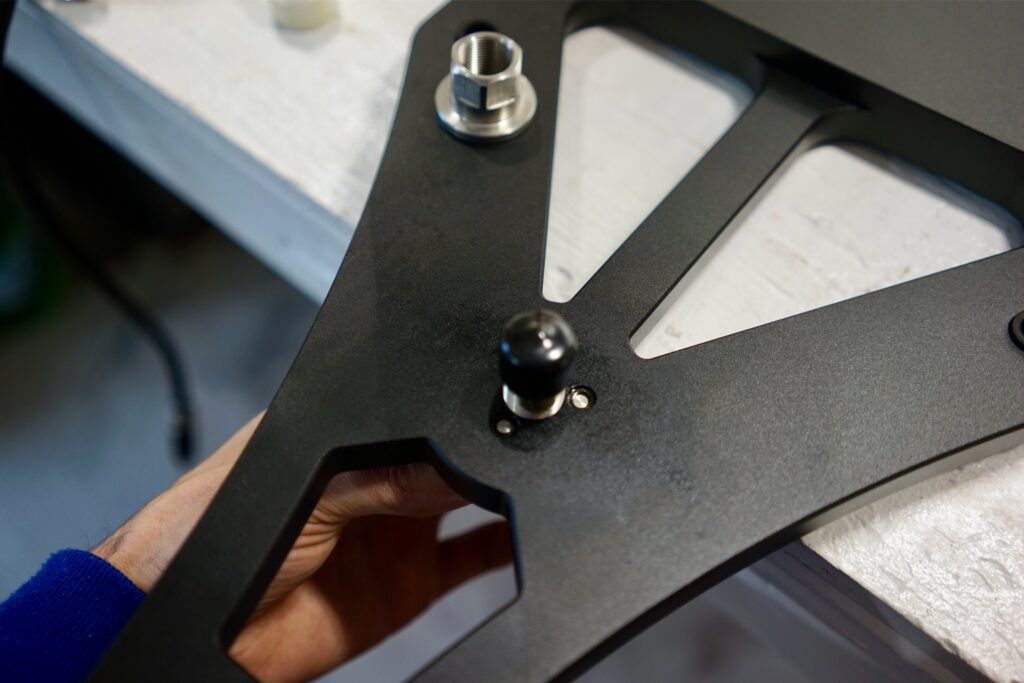
When I looked through the bits included in the Karousel box, I wasn’t sure what the little rubber plug was for. Once I had the bearing in, it all made sense. A standard bearing cap doesn’t fit onto the Karousel’s massive nut once installed. So you use the plug instead, to keep the bearing clean and keep oil from spilling when turned upside down.
I got the subchassis back in and the springs installed, set up the suspension, and was ready to rock.
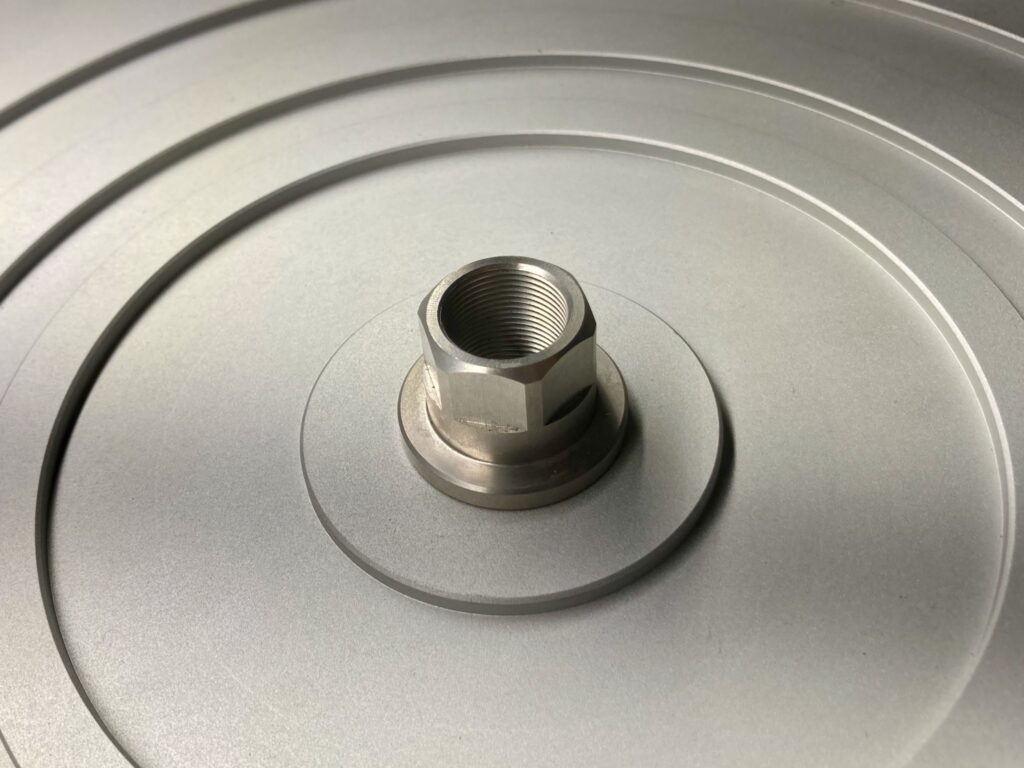
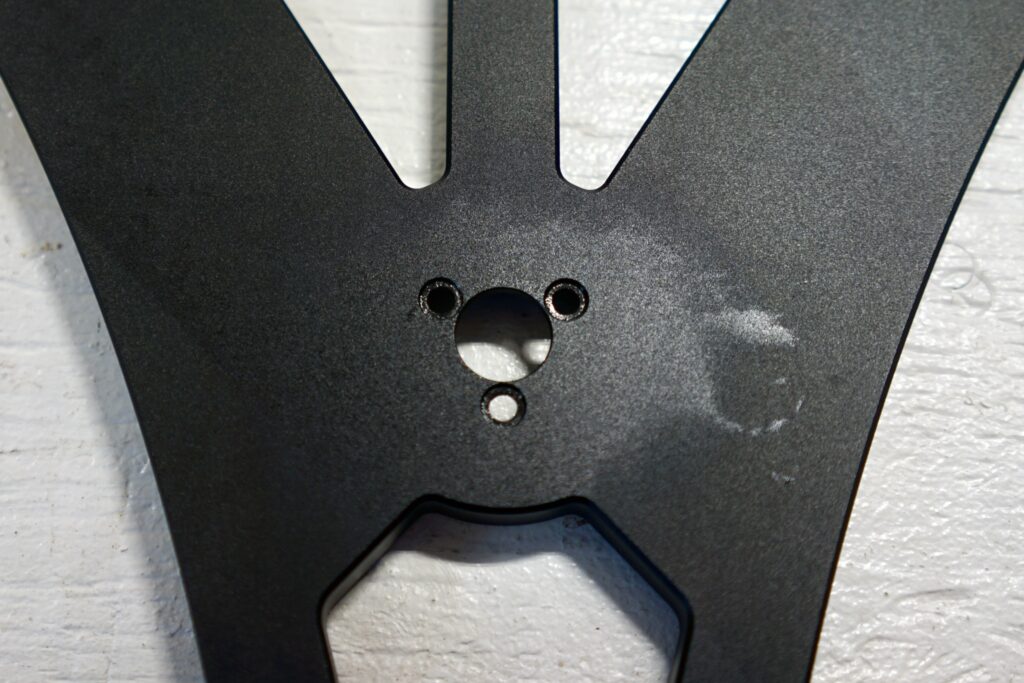
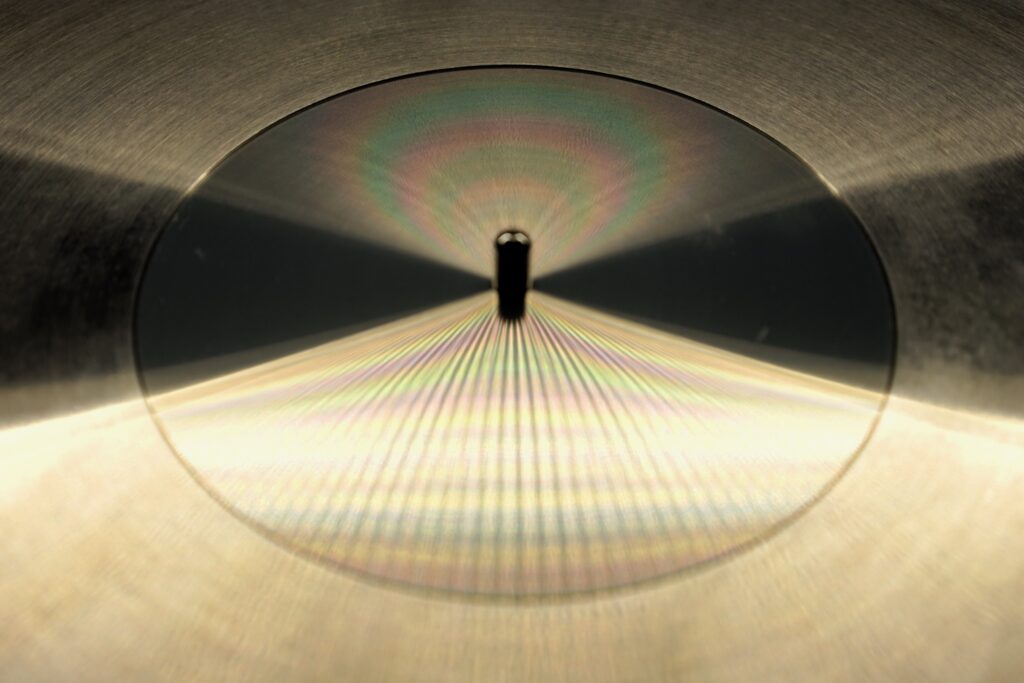
Although I’m a big fan of the Mober subplatter, I removed it and went with the supplied Karousel subplatter for this test. It reflects light from my bench light in a pretty way:
This is what it looks like from below:
And above:
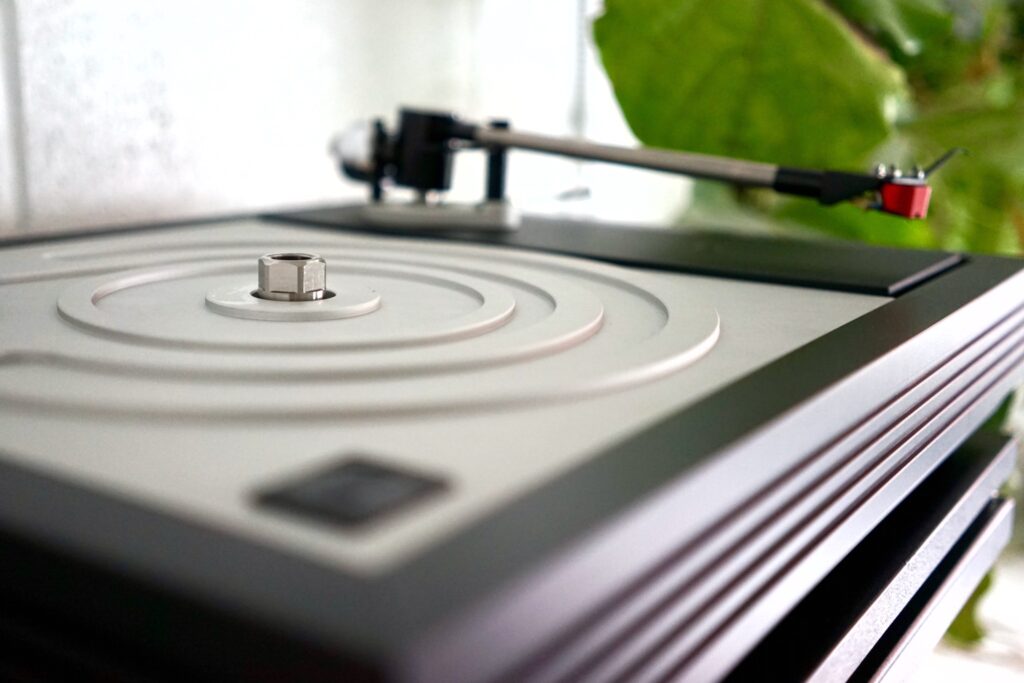
I’ll give myself a few weeks to process the actual sound of the Karousel. But for now, as I mentioned, it seems pretty remarkable.
10 Comments
Join the discussion and tell us your opinion.
I didn’t think there was much risk of over-tightening with those big stainless steel threads. So I got it as tight as I could.
“ This is incorrect, should be 3.5Nm. If you overtighten, will be clamping to itself and not the sub platter, this will compromise the sound. That was what we were taught at the Linn training day.
The “clamping to itself” issue is, I imagine, that the three “nubbies” that sit in the old bearing mounting holes would push through and make contact with the top nut? I can see that being the case with a thin subplatter surface at the bearing interface — 1.2mm for a pre-Cirkus, for example — but given that the “nubbies” in the Karousel are 1.5mm deep, I doubt that the Karousel would be able to clamp to itself with a Kore (2mm deep at bearing interface spot) or Mober (3mm). My sense is that the main advantage of the Karousel over the Cirkus is the greater clamping force provided by the big nut attachment system, but I will, of course, experiment with this and report back 🙂
Hi, I’ve yet to install my Karousel – as I’m waiting to get a new top cap made and modify my TP Tranquility so as to get the best of both…
Ooh please keep me posted about your progress! Over on AudioFlat we’ve been talking about this issue. Tranquility co-designer Mark/YNWaN is helping us try to figure out how it could be done. It would be nice to get a batch of them made. I’d be in for one, that’s for sure!
Hi, well I should be getting the part this week or worst case next week. It’s two new parts and one modified, so its not quite as easy as having a load made of parts made… I intend to build it in over easter along with a host of other new parts, so it won’t be easy to determine the exact effect of the Bearing / Tranquility mod on their own but hey ho, I know I’ll be getting the best of it…
Glad to know that Karousel can be installed on Mober sub-chassis without any issue! Look forward to your listening result. Thank you.
Coming soon! 🙂
Thank you for your detailed review. I am missing however the details on the spring(s) and bolt(s). Is there also a particular Nm force that I have to tighten the bolts for the springs? Can you give me more details on that? Thank you
Hi Frans,
The springs and grommets are identical to the Cirkus. I don’t use a torque wrench. In practice, you tighten the bolts such that the armboard is level in the cutout, then make fine adjustments to get the required bounce.
For anyone without a torque wrench, a 2KG weight suspended from a 180mm lever (spanner) will give you around 3.5Nm
There’s an improvised torque calculator here where you can input the length of your lever and it will calculate the weight required: https://www.engineeringtoolbox.com/torque-wrench-luggage-scale-d_1909.html